Replacing fuel tanks for boats is no easy chore, but if a tank starts to leak or otherwise fail, swapping it out for a new one is necessary. Just how big a job this is depends on the boat. Some manufacturers wisely provide sufficient access to do the job, but some others foam or fiberglass the tanks in place and then cover them up with a solid deck. In many situations, you’ll have to saw through the pieces-parts of your boat and then re-fiberglass major sections back together to get the replacement done. It’s a big enough job that the majority of tank replacements are done by professionals as opposed to DIY boaters. In all cases, however, the basics boiled down to four parts:
- Disassembling and/or opening up the boat as necessary to remove the old tank.
- Replacing the tank with a new one.
- Plumbing and wiring the tank and sender.
- Repairing or reassembling the deck and structure.
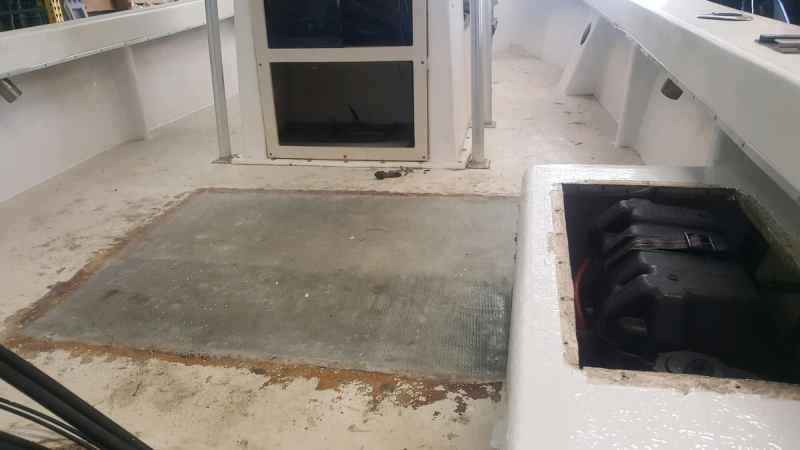
Removing the Old Fuel Tank
The nature of this job can vary from simple to complex, depending on the boat. If you’re in luck, it might mean peeling up a strip of silicon, undoing some screws and popping off a large section of the deck. In other cases, it can mean sawing open a very large hole. All boats are different and there’s no one-size-fits-all description as to what will need to be done, but suffice it to say, you’ll need to open up an area large enough to remove the tank.
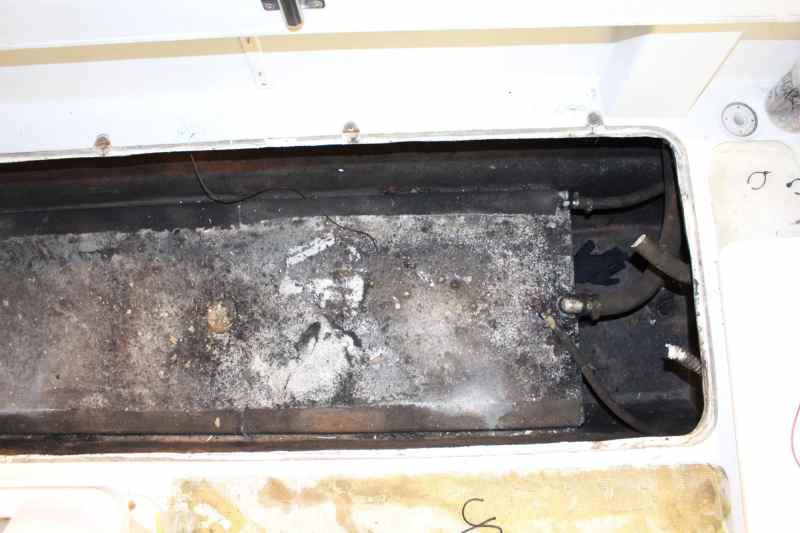
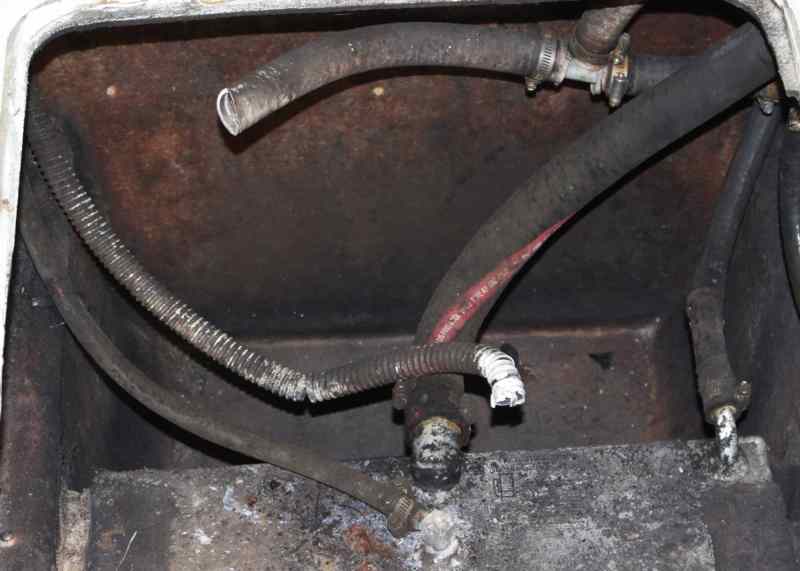
Unfortunately, there’s more to this process. If the tank was foamed in place (a fairly common boatbuilding procedure) and the tank leaked, the foam is likely saturated with fuel. That makes it hazardous, so along with the tank you’ll need to remove the foam. Then there’s the plumbing running to and from the engine(s) as well as to the fuel fill and vent. Since these lines are all probably as old as the tank, it makes sense to replace them while you have these normally inaccessible areas opened up. Same goes for the fuel gauge sender and the wiring.
Replacing a Boat Fuel Tank
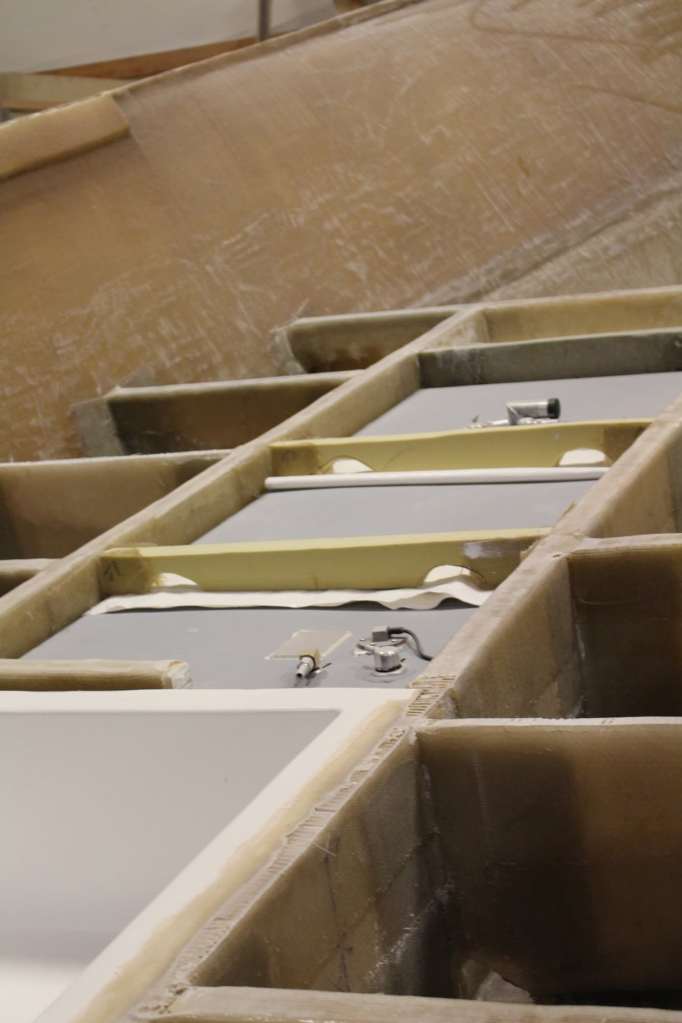
With the old tank and associated materials removed, you can drop in a new tank. The main choices on today’s market are aluminum and rotomolded polyethylene. Aluminum used to be the standard, but since polyethylene tanks don’t corrode; are available in a number of shapes and sizes; and cost significantly less, their popularity has grown in recent years. There are, however, some potential downsides to polyethylene tanks. First, is the inability to customize them beyond what shapes and sizes are commercially available. If you have a peculiar space to fill, you’ll likely need to have an aluminum tank custom-made to fit. Room for the plastic’s expansion has to be accounted for when mounting poly tanks, which may swell to some degree. And sometimes you’ll see a loss of overall capacity comparatively speaking, because molded-in baffles have to be relatively wide for molding and structural requirements, which eats into interior volume. Finally, poly tanks only get so big, and your choices become very limited once you get beyond 150 gallons or so.
New tanks are not just dropped into place, either, they need to be mounted as per the manufacturer’s instructions and in accordance with USCG regulations. This typically includes prepping the mounting surface and securely strapping the tank down. Most manufacturers do not recommend re-foaming the tank in place even if the boat was originally built that way, and some explicitly state that foaming the tank in place will void the warranty.
Replacing Plumbing and Wiring
With the tank in place, it’s time for attaching all the plumbing and vent lines. Hose clamps are used to secure them, and then the sender and grounding wires can be connected.
After the tank is in place, plumbed, and deemed ready for use, a leak test should be performed. Pressurize the tank to three psi (or as per manufacturer instructions), then apply soapy water to all the connections. Each connection should then be carefully inspected for the presence of bubbles, indicating a leak. If any leaks are found, the connection should be re-seated, tightened and tested again.
Repairing the Deck and Structure
With the new tank in place, properly secured, plumbed, and leak tested, the boat’s structure can be repaired or reassembled as necessary. Naturally, if cutting out the deck was part of the project this can be quite an undertaking. And ensuring a structurally sound deck is critical on any boat. This is just one more reason why in most cases, replacing a fuel tank is a job that’s best left to the professionals.


