If you live in a climate where the temperature drops below freezing, winterizing your outboard engine is critical. In fact, a failure to winterize followed by a blast of frosty weather can cause significant damage, leaving you with a fat repair bill come spring. Fortunately, winterizing an outboard isn’t very complex and most do-it-yourselfers can get the job done in an afternoon. In fact, we can break it down into a series of four easy steps:
- Flush the motor
- Change the oil
- Fog the motor
- Stabilize the fuel
Flushing an Outboard Motor
We certainly hope you’re familiar with this process, because flushing with clean fresh water after each and every trip is one of the best ways to extend your outboard engine’s lifespan. All modern outboards have a flushing port threaded to fit a common garden hose, which allows you to flush the engine without starting it up. Find the port (look in your owner’s manual if it isn’t obvious), spin on the hose, turn on the water, and let it flow for at least five minutes. If you have an old model engine without a flushing port, you can place a set of earmuffs over the water intakes, turn on the water, then start the engine and run it until it’s thoroughly flushed out.
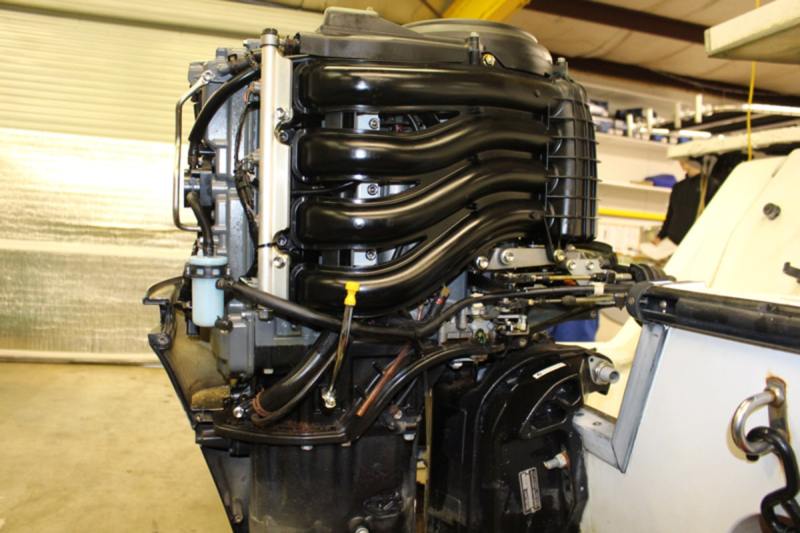
Changing the Oil
In a modern four-stroke outboard, you’ll have two oil changes to perform: the powerhead oil and the lower unit oil. Two-strokes don’t have powerhead oil, but will still need a lower unit oil change. To change the lower unit oil, you need to remove the top and bottom drain screws and catch all the old oil in a pan, for recycling later. Be sure the engine is tilted slightly up to angle the lower unit downwards, so all the oil drains out. After it is fully drained, use a lower-unit oil pump to pump fresh oil into the lower unit. When oil begins seeping out of the top hole, it’s full. Replace the top screw first, then remove the oil-pump fitting and quickly replace the lower screw before oil has a chance to seep out.
Changing the powerhead oil is very similar to changing the oil in an automobile; there will be a dipstick for measuring oil level, a drain for catching the old oil in a pan, an upper port for adding new oil with a funnel, and of course, a filter that needs to be replaced. If the locations for these aren’t obvious when you remove the cowl, refer to your engine’s owner’s manual. It’s also a good idea to check that manual ahead of time so you know what type of oil to use and how much you’ll need to replace.
Why change the oil now, as part of the winterization process? Oils have acid buildups that are created as the engine is run, and when that outboard is going to sit for an extended time it’s best to make sure the oil is fresh. Changing the oil now also offers a chance to be sure that there’s no water contamination (it will look milky), which could lead to freeze-damage when the temperatures drop.
Fogging an Outboard Motor
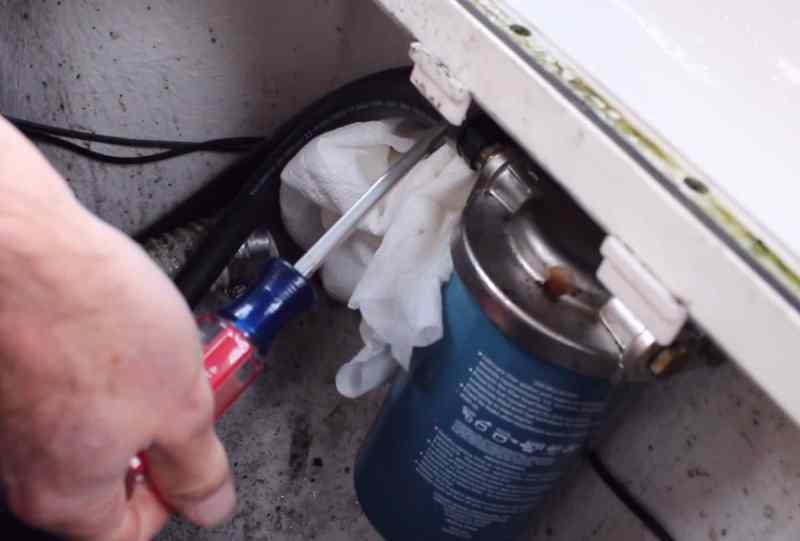
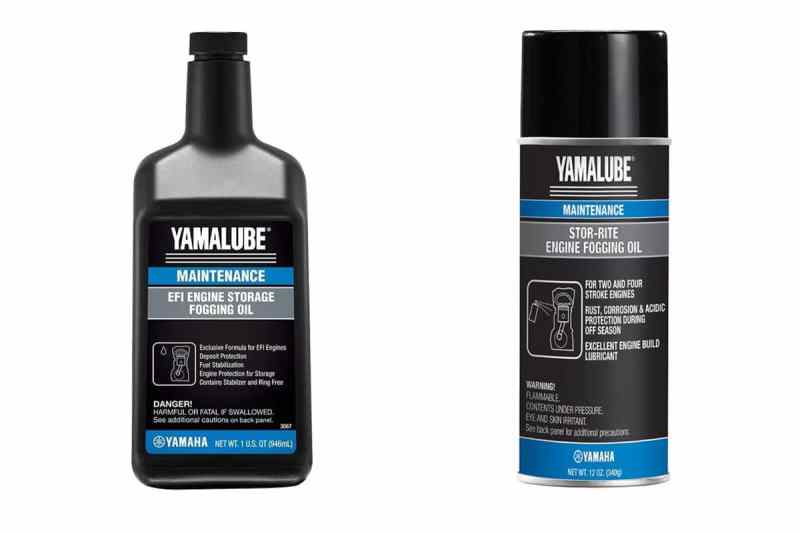
With older outboards, fogging was a rather painstaking process where you had to spray fluid into the carburetor and cylinders. Good news, folks: most of the outboards out there today have EFI fuel-delivery systems rather than those old carburetors. And in most cases, you can fog the motor by adding fogging fluid to a portable fuel tank, removing the fuel line at the filter and placing it in the portable tank, then running the fuel/fogging oil mix through the engine. Be sure to follow your owner’s manual recommendations and the instructions on the fogging oil to get the right ratio for the fuel and oil mix.
Note that if you use your outboard throughout the winter at least once a month, there’s no need for fogging it. In fact, many boaters skip fogging altogether and simply make sure they run the outboard up to operating temperature at least once every three to four weeks.
Stabilizing the Fuel
With today’s ethanol fuel, it’s very important to add a fuel stabilizer when your boat will sit for extended periods of time. First, fill the tank so there isn’t a lot of open space where condensation might form, then add the stabilizer directly into the fuel tank in the amount as per the manufacturer’s instructions.
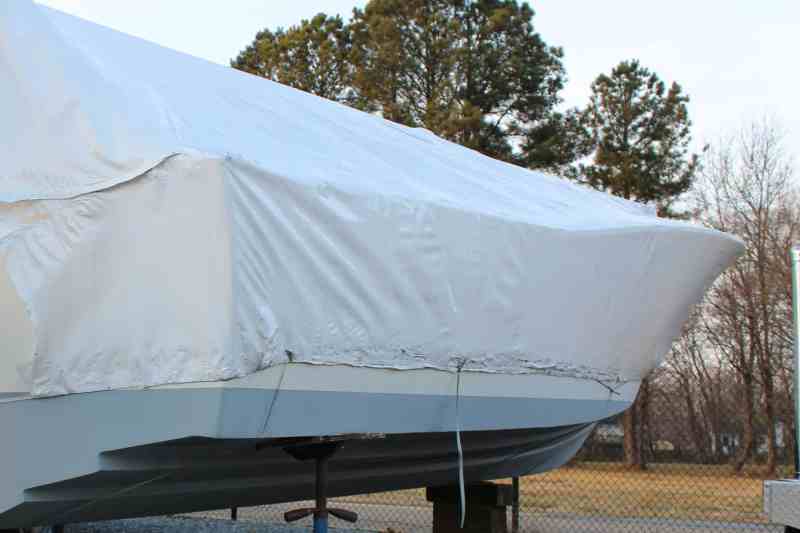
What about antifreeze? With an outboard, it’s completely unnecessary just as long as you remember to store the engine in the tilted-down position. Outboards are designed to drain completely when tilted down, so water damage won’t be any issue. That said, it’s a good idea to tilt the engine up and down a couple of times and watch for any water coming out to make sure it’s completely drained. Then you can disconnect the battery and put it on a trickle-charger for the winter, address winterizing the boat itself, securely cover the boat , and then kick back and wait for the return of warmer weather and another boating season.


