Making sure you wire a boat switch panel correctly is absolutely critical. Whether you’re talking about the livewells, lights or bilge pumps, if that switch panel isn’t proper, sooner or later something won’t work. Worse, improper wiring could even lead to a meltdown and potentially, a fire aboard the boat.
Before digging into the details, there are a few important items you’ll need to know regardless of the specifics of the job. First, always follow the manufacturer’s recommendations when it comes to wire gauge, fuse and/or breaker size, and other specifics. Most boats and marine accessories are built to American Boat and Yacht Council (ABYC) standards, which include wiring and switch-panel specifics. These should always be adhered to. We also need to note that all boats are a bit different, and there are often good reasons to make exceptions to the generalizations we’re making here or do things a bit differently.
Choosing a Switch Panel for a Boat
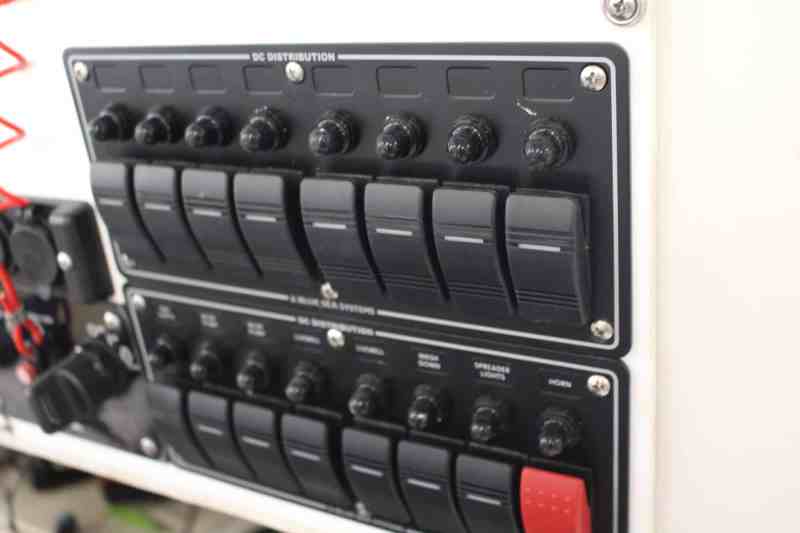
The panel you’ll need depends on the size of your boat and the number of systems it has. As a rule of thumb, always choose a panel that has several additional switches to the ones you need to wire up. That way, you can add more accessories down the road and will have the switches available for use. Naturally, the switch panel must be rated for marine use and if it will be exposed, waterproof.
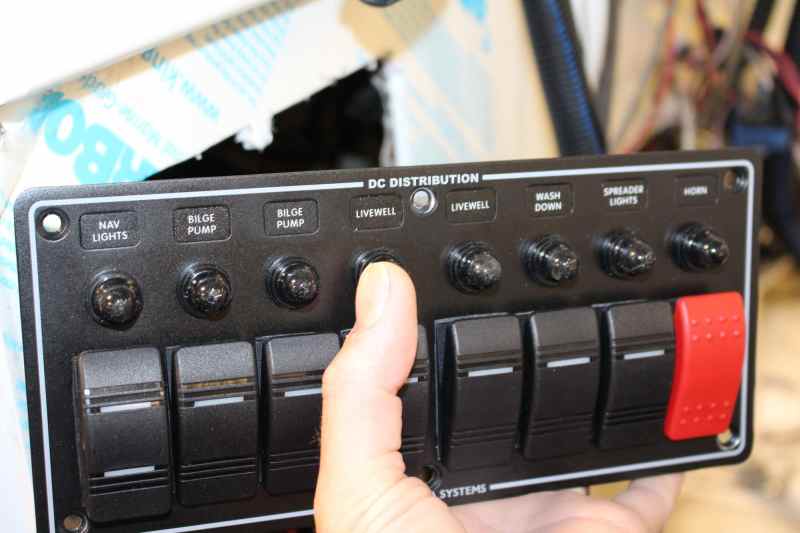
You can choose between a number of switch styles, which generally includes rocker switches, toggle switches or push-buttons. Most are illuminated, but not all are, and illumination can be quite helpful so you can see what’s activated and what isn’t at a glance. You can also get a switch panel with breakers or one with fuses. Breaker panels tend to cost a bit more, but they’re far more convenient since they allow you to reset the switch without having to carry fuses and replace them when necessary. However, breakers will have a set number of amps as opposed to being able to change fuses for different sizes. Sometimes you’ll see panels with no breakers or fuses, but in that case, a separate fuse or breaker panel must be added.
Also consider how many multi-position switches you need. If you want your running and anchor lights on a single three-position rocker switch, for example, a regular two-position switch won’t do the job. You’ll need at least one three-position switch (for off, anchor and running) on the panel.
Making Connections to a Boat Switch Panel
You’ll need to attach either ring or spade connectors to the ends of the accessory wires. Either is fine, but never try to fake it by attaching a bare wire end to a terminal.
When attaching a connector to the wire it should always—always—be crimped. Soldering and crimping together is best, but soldering alone is never recommended on a boat. Boats are subject to too many vibrations when running through the waves, and over time connections made with solder alone will weaken and break. Ideally, the connections should then be protected with waterproof heat-shrink tubing. You can purchase heat-shrink tubes separately, but you can also purchase connectors with the tubing already installed.

Getting Power to the Panel
Begin by getting juice to the panel itself. Again, follow the manufacturer’s and/or ABYC recommendations for wire gauge. And be sure to use tinned-copper wires, which are the most corrosion-resistant.
Run the main power line (positive, red) to a battery switch or isolator, not to the battery itself. Otherwise, you’ll likely suffer from a constant draw that could leave you with a dead battery from one week to the next. Note: automatic bilge pumps are an exception to this rule, and should have a separate power line giving them a constant feed regardless of battery switch position, as well as the lead running to the panel for manual activation.
At this point, we’re ready to attach the negative line (black). However, just where and how you will do so can vary depending on the panel and the boat’s existing wiring. Some panels have a small integrated bus bar, while in other cases there will be a separate negative bus bar that provides a common ground. Either way, the negative line connects directly to the negative terminal of the battery.
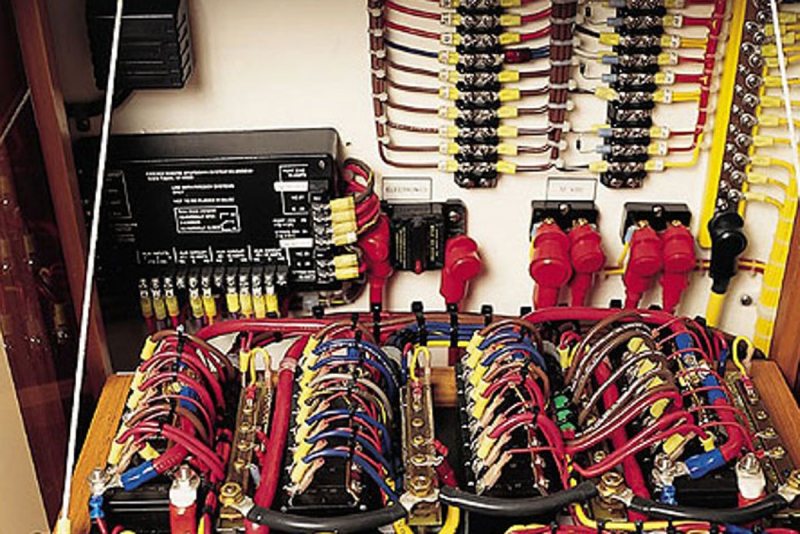
With the power supply complete, you can begin wiring in each individual system or accessory to each individual switch. As you do so, be sure the wires are physically supported with cushioned clamps or at the very least tie-wraps, so they don’t swing and sway. Remember that any physical motion in the lines will be amplified over and over again every time the boat is subject to vibrations, and eventually, that motion will lead to failed connections.
When wiring the boat’s switch panel be sure to keep the wiring as neat as possible, eliminating excess wire as much as possible. Everything on a boat eventually needs to be serviced, including wires and connections, and the bigger the mess is the tougher it will be to identify and isolate specific wires and connections down the line.


